

How to Install a Retractable Screen Door
Instead of presenting a home improvement that takes two or three days to complete, here's a simpler project you can finish in a single day. And all you need are a few basic hand tools, a cordless drill/driver and a free afternoon. This is an easy-to-operate screen door that's unlike any you've probably ever seen. It doesn't swing on hinges or roll on wheels, but instead pulls down like a window shade.
Here, we're installing a Screenex Hideaway Roller Screen Door, which glides up and down as smoothly as a window shade. It consists of a fiberglass screen rolled up inside a 2-in. sq. aluminum case, or storage cassette. The cassette is installed horizontally over the doorway. Aluminum side tracks are mounted vertically to the doorjambs to support the edges of the screen. And because there's no track along the sill, there's no place for dirt and debris to collect and interfere with the screen. We installed the Screenex Model PD7283 in front of a 6-ft.-wide pair of French doors. Other models are available for doors ranging in width from 3 to 8 ft. There's even a way to use Screenex doors to enclose a two-car garage or open-air porch. Doors are available in white, almond and brown.
Here, we're installing a Screenex Hideaway Roller Screen Door, which glides up and down as smoothly as a window shade. It consists of a fiberglass screen rolled up inside a 2-in. sq. aluminum case, or storage cassette. The cassette is installed horizontally over the doorway. Aluminum side tracks are mounted vertically to the doorjambs to support the edges of the screen. And because there's no track along the sill, there's no place for dirt and debris to collect and interfere with the screen. We installed the Screenex Model PD7283 in front of a 6-ft.-wide pair of French doors. Other models are available for doors ranging in width from 3 to 8 ft. There's even a way to use Screenex doors to enclose a two-car garage or open-air porch. Doors are available in white, almond and brown.
TIP: Before purchasing a door, measure the inside width of the doorway at the top and bottom of the opening. If the door frame is out of square by 1/4 in. or less, you can go ahead and order the screen door. If it's out by more than 1/4 in., you'll have to adjust the jambs to square up the frame.
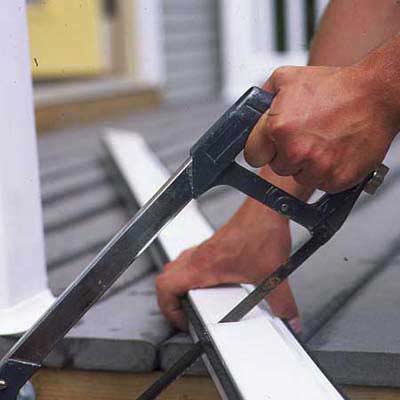
1. Trim to fitThe retractable screen door glides as smoothly as a window shade and consists of a fiberglass screen rolled up inside of a 2-inch-square aluminum case, or storage cassette. The cassette is installed horizontally over the doorway. Start by using a hacksaw to trim the storage cassette and screen down to the proper width. It should be 1/8 in. less than the width of the opening.
2. Re-assemble the parts
After cutting the cassette down to size, replace the plastic end caps, which simply snap back onto the just-cut cassette. Also replace the screen handle.

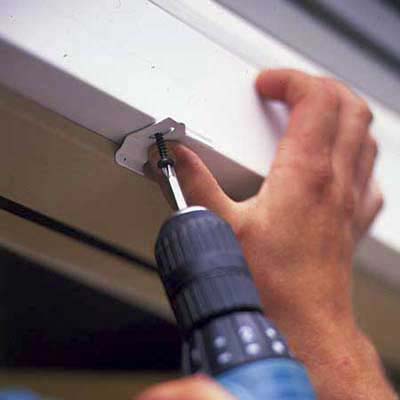
3. Attach the mounting clips
Next, screw two metal mounting clips to the head casing over the door. Make sure the curved lip on each clip faces in toward the doorway.
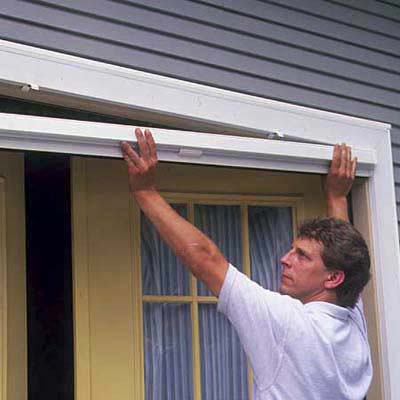
4. Mount the storage cassette
Carefully raise the storage cassette to the top of the doorway and snap it into the two mounting clips. Mark a horizontal pencil line along each side jamb directly underneath the cassette.
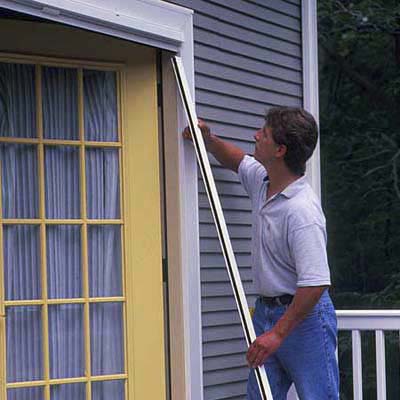
5. Install the side tracks
Take down the cassette and measure from the sill up to the pencil lines. Subtract 1/8 in. from those dimensions and cut the two aluminum side tracks to match. Reinstall the cassette. Slip the side tracks into place under the ends of the cassette.
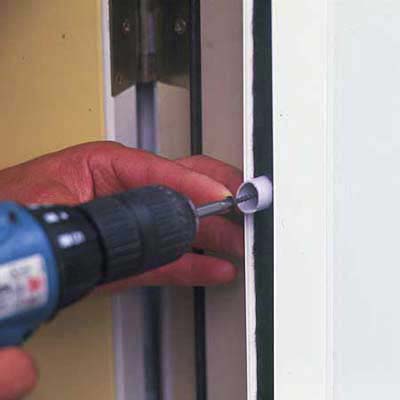
6. Secure each side track
Secure each side track to the doorframe with four 1½-in. screws. Insert a short section of plastic pipe into the track to separate the weather stripping, then drive in the screws.
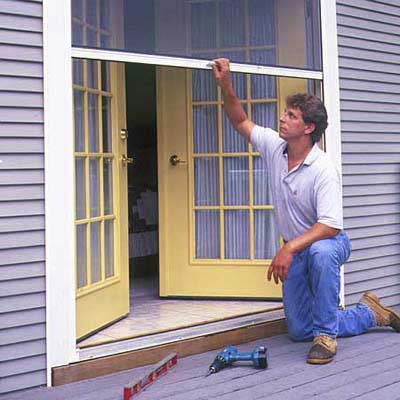
7. Test the screen door
Test the door by pulling the screen up and down a few times. Check to make sure that it remains within the side tracks at all times and latches securely at the bottom. Note that the tension on the screen is preset at the factory. However, if it ever needs to be adjusted, just pop off an end cap from the cassette and wind the screen a little tighter.
Fitting Old Doors in New Frames
No comments:
Post a Comment
Hi, please feel free to share your comment here.
For example: Which pictures is the best?
Thanks,
Admin